3.31.2014

Glam Tissue Box Cover

I needed a quick and easy project this week because my kids have been in what I call "outside starvation mode". We haven't been able to play outside since the beginning of December here and they need my constant attention with projects and things to do. This leaves little time to get anything done besides housework, but I still have a few moments of time when they are both taking a nap to get a little creative. So here is my super quick and easy tissue box cover.

I started with a wooden tissue box cover from my local craft store. They have them available in wood and heavy duty paper material but I opted for the wooden one since I think it will hold up better. If you wanted a super smooth finish, the paper one would work better and still hold up pretty well.


All I did was paint it with one coat of white craft paint and then I did my design in gold Testors Hobby paint. That was easy!!


I just love how the light shimmers off the edges!!


 Happy crafting!!


3.24.2014

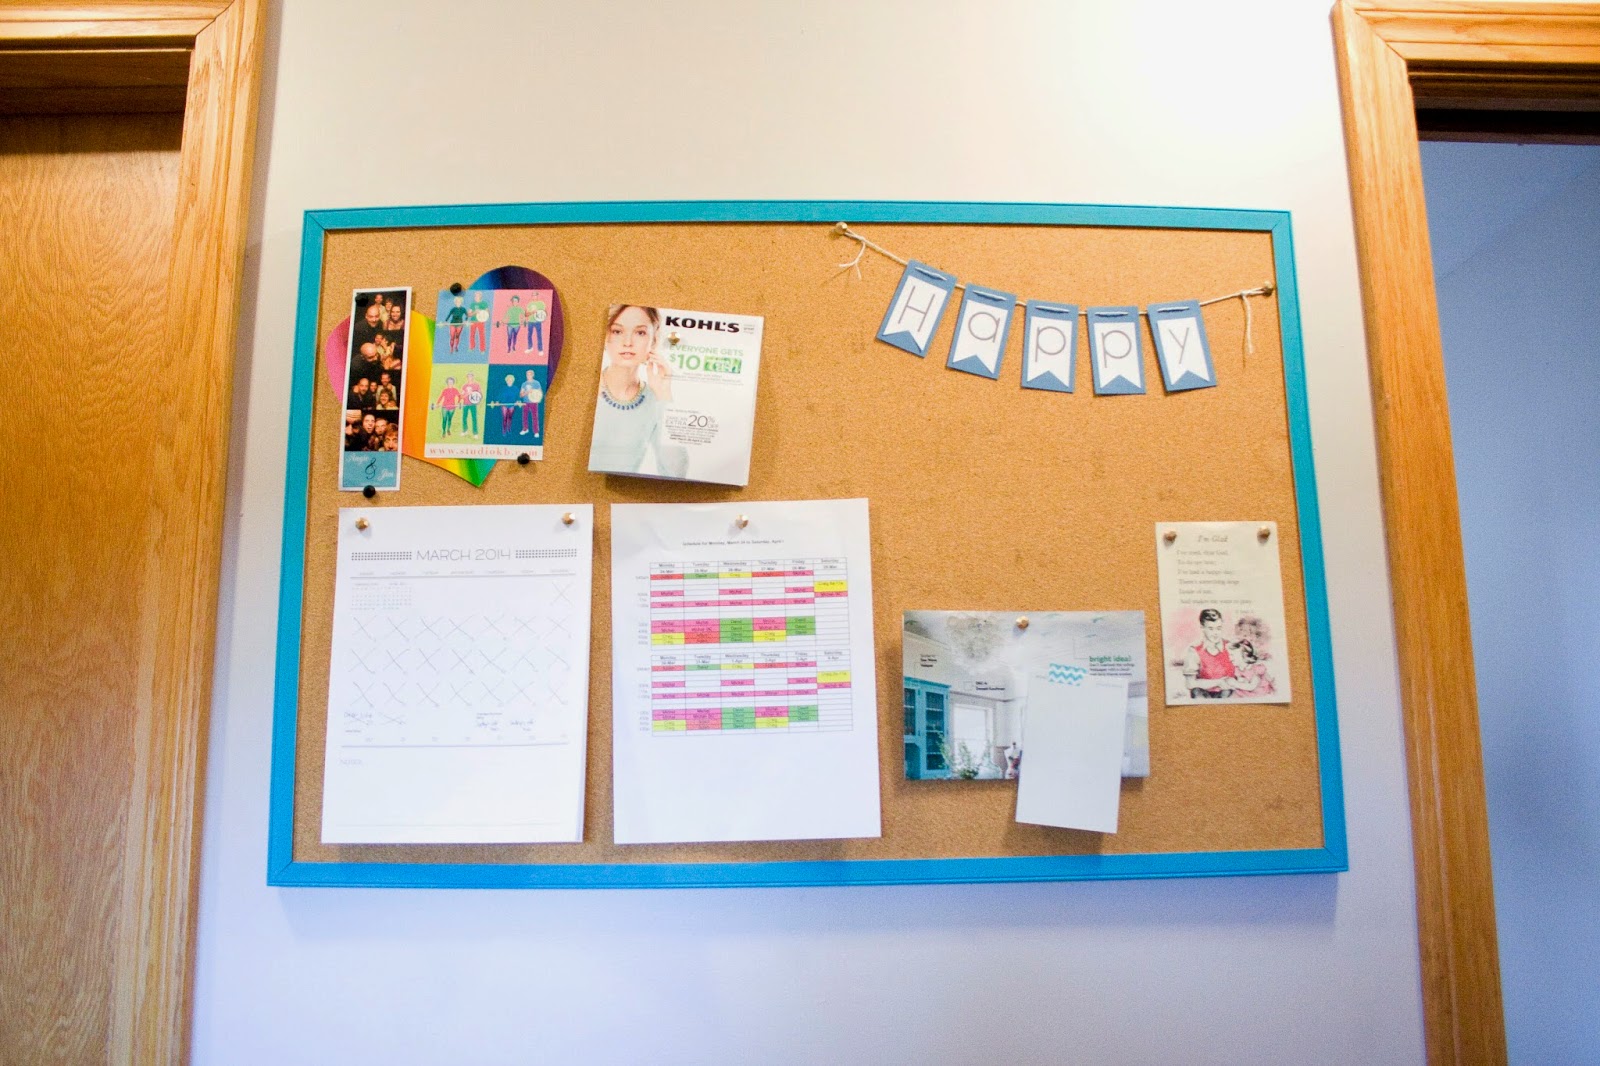
An Organized Bulletin Board & Glam Thumb Tacks

Our refrigerator had started looking cluttered and not very pretty because of all of the papers, photos, schedules, artwork, etc. that always ended up on it. I needed another solution badly so that my 1 year old wasn't tearing up everything. Each time we opened the door, everything would shift south until it ended up on the floor. Our magnets weren't strong enough to hold all the crap we had on the fridge and I needed to find another home for it all.

A plain bulletin board that my mom was happy to give to me needed just a little color and it could quickly solve my problems.

I added a little turquoise paint around the frame and it perked right up. So I put it up in the hallway between our kitchen and entry but it still needed a little something.
So I bought: a 200 ct. pack of regular silver thumb tacks for $1.25
                   a pack of black gemstones for $1.50 and
                   a bottle of Testors enamel paint in metallic gold from my local craft store for less than $2.00
                                  (This stuff adheres to anything and I use it for all sorts of projects. It is where you                                             would find the model car kits.)


Glued some gemstones to my tacks and once they were dry, painted them with the enamel paint and left to dry overnight.


Aren't they pretty?


So you can see how pretty these look compared to regular silver tacks. And my calendar is a free printable I downloaded and printed out from Miss Tiina. Get it here Free Printable Calendar.


Now I have a place for my calendar, hubby's work schedule, decor inspiration and of course some fun pictures. Now my refrigerator looks clean too!


I am glad it is spring now and looking forward to some warmer weather!! 

3.13.2014

Traditional to Modern- Clock Makeover


I was gifted a clock after I had my first baby to keep in his room. It was a very nice gesture but not at all my style. I would look at it every day with it's wood frame and traditional numbers and I knew it had more potential to fit into my nursery's modern style. So almost 3 years later with a little time and paint, it has become a beautiful addition to the room. This project was super easy to complete in a day. So I started with my regular looking clock, pretty but not fitting in very well.


It was easy to take apart with 4 screws in the back.


I spray painted the hands so I could get into all the crevices without the hands sticking together.


Then painted over the spray paint residue with craft paint on the face of the clock. I moved the hands out of the way to reach all the points around the center.


I screwed the two pieces back together and put it back in the nursery.


Perfect touch of color to match the rest of the room! Happy crafting!!


3.10.2014

Paint By Number Thrift


Last week I stopped by Goodwill and hiding behind some not so interesting artwork was this picture. I think it's a beautiful piece of art with the colors. My son asked me who it was when I brought it home and I told him it was Jesus and the little children. Now he keeps asking me, "Is that me and Jesus?" which just makes me smile.


 The frame has a few chips and dents in it so I am probably going to paint it, maybe an aqua or tan that blends well with the picture.


 It will go along side my last supper picture in the stairwell leading to my basement. I am going to do a post about my paint by number picture collection this week so you can see all of them!


Go thrifting, you might find something you like!

3.08.2014

St. Patty's Day Welcome Sign

Personalized crafts are my favorite kind to make. I love one of a kind items to display in my home, especially on holidays. We are not Irish so I don't do a whole lot of St. Patrick's Day decorating, but I thought I would make an easy, inexpensive and personalized welcome sign. It doesn't get easier than this!


I started by gathering my supplies at my local craft store:

1. an inexpensive, already painted wooden St. patty's Day sign- $3.00
2. 4 wooden shamrocks- 50 cents each
3. green glitter glue- $1.50


I already had green paint and brushes and my drill for the other steps.

So I chose this pre-painted sign, it was cute and I could not have made one for less than $3.00 with the cute cutout hat.

I painted the shamrocks a light green and a few dark green so I could alternate them.


I added our names and drilled a hole in the top and bottom of each one and wired them together and then to the sign.


I also outlined the light green shamrocks with the glitter glue to add a little sparkle. 
I love it and it adds a little welcome to our home in the month of March.


Happy crafting!


3.04.2014

Kids Bench Makeover


My mom just gave me an old bench that my brothers and I used when we were kids. Its cute, but needs a fresh coat of paint to match my non-red home. It has so much potential but I have too many ideas and can't decide. Which do you like best?

3.03.2014

Styling A Bookcase


I have a very tall, build in bookcase in our living room that has really only seen books, books and more books. When my grandparents lived here, they had tons of books that loaded the shelves, like their full collection of encyclopedias. When we moved in we had lots of college books, bible study books, yearbooks, just a lot of books, so what did I do? I shoved them all up on the bookcase and forgot about it.  My kids would tear everything off of the bottom 3 shelves and the top ones looked cramped and sad. Fast forward to the days of Pinterest and mobile children I decided it was time to change things up.

So I started by taking everything off the shelves.
These are my piles of books that are going elsewhere.

And these are the only ones going back on the shelves.

So I added the books back up first because I felt they were the least pretty to look at and I didn't mind if some were hidden.
Next I added some pictures that were in black frames, the single color frame helps to make it look cohesive. I also added my blue glass pieces. 
And finally I set all the other items I had, a collection of nesting dolls, an antler my husband found in the woods, an old camera, etc. 


Making sure there are themes throughout the shelves tie everything together. I love having lots of color and I think it is a nice change from the old boring bookcase.

I added my quilts back into the bottom 3 shelves which add a peek of color from behind the sofa.
 In the end I am so happy to have put my favorite things out on display. I am so happy to have purged so many books that I never used, it feels great!


Now I love my bookshelf the most in my living room!!